Understanding StyleAligned
For the last two years, the improvement in fidelity and control in diffusion models has been incredible; generation results are often indistinguishable from real images, and a huge ecoystem of tools has emerged to offer various forms of control over the generation process. However, for a lot of real-world workflows, you quickly run up against limitations that make things hard for less technical users.
- Let's say I have a specific style in mind, and I want to generate images in that style, such as the art style of a game or film I've created concept art for. I can train a Textual Inversion or a LoRA fine-tune; but such a process can take tens of minutes, and can be error-prone; I need dozens of input images, preprocesseed correctly, and the resulting LoRA or Textual Inversion model may not be able to generate the style I want, or cause the model to forget other concepts.
- Or, I have a specific person or character, such as the main character of my game, that I want to put in a bunch of different scenes. Again, I could train a DreamBooth model, or use something like IP-Adapter, but DreamBooth models also require training; and adapter models like IP-adapter or InstantID often give inconsistent results, or overfit to the original face; and require loading up secondary models that may require additional VRAM.
There are really great solutions for both use cases, don't get me wrong; however, as seen above, there are caveats to both that can put the current solutions out of reach of casual users of generative models. The holy grail, then would be a technique that:
- Accurately captures the style of a given image, or the identity of a given person, with minimal input from the user.
- Doesn't require loading extra weights, or invoking any forgetting in the base model.
- Doesn't overfit to the input image, or the input person, and can generate a wide variety of images in the given style or with the given person.
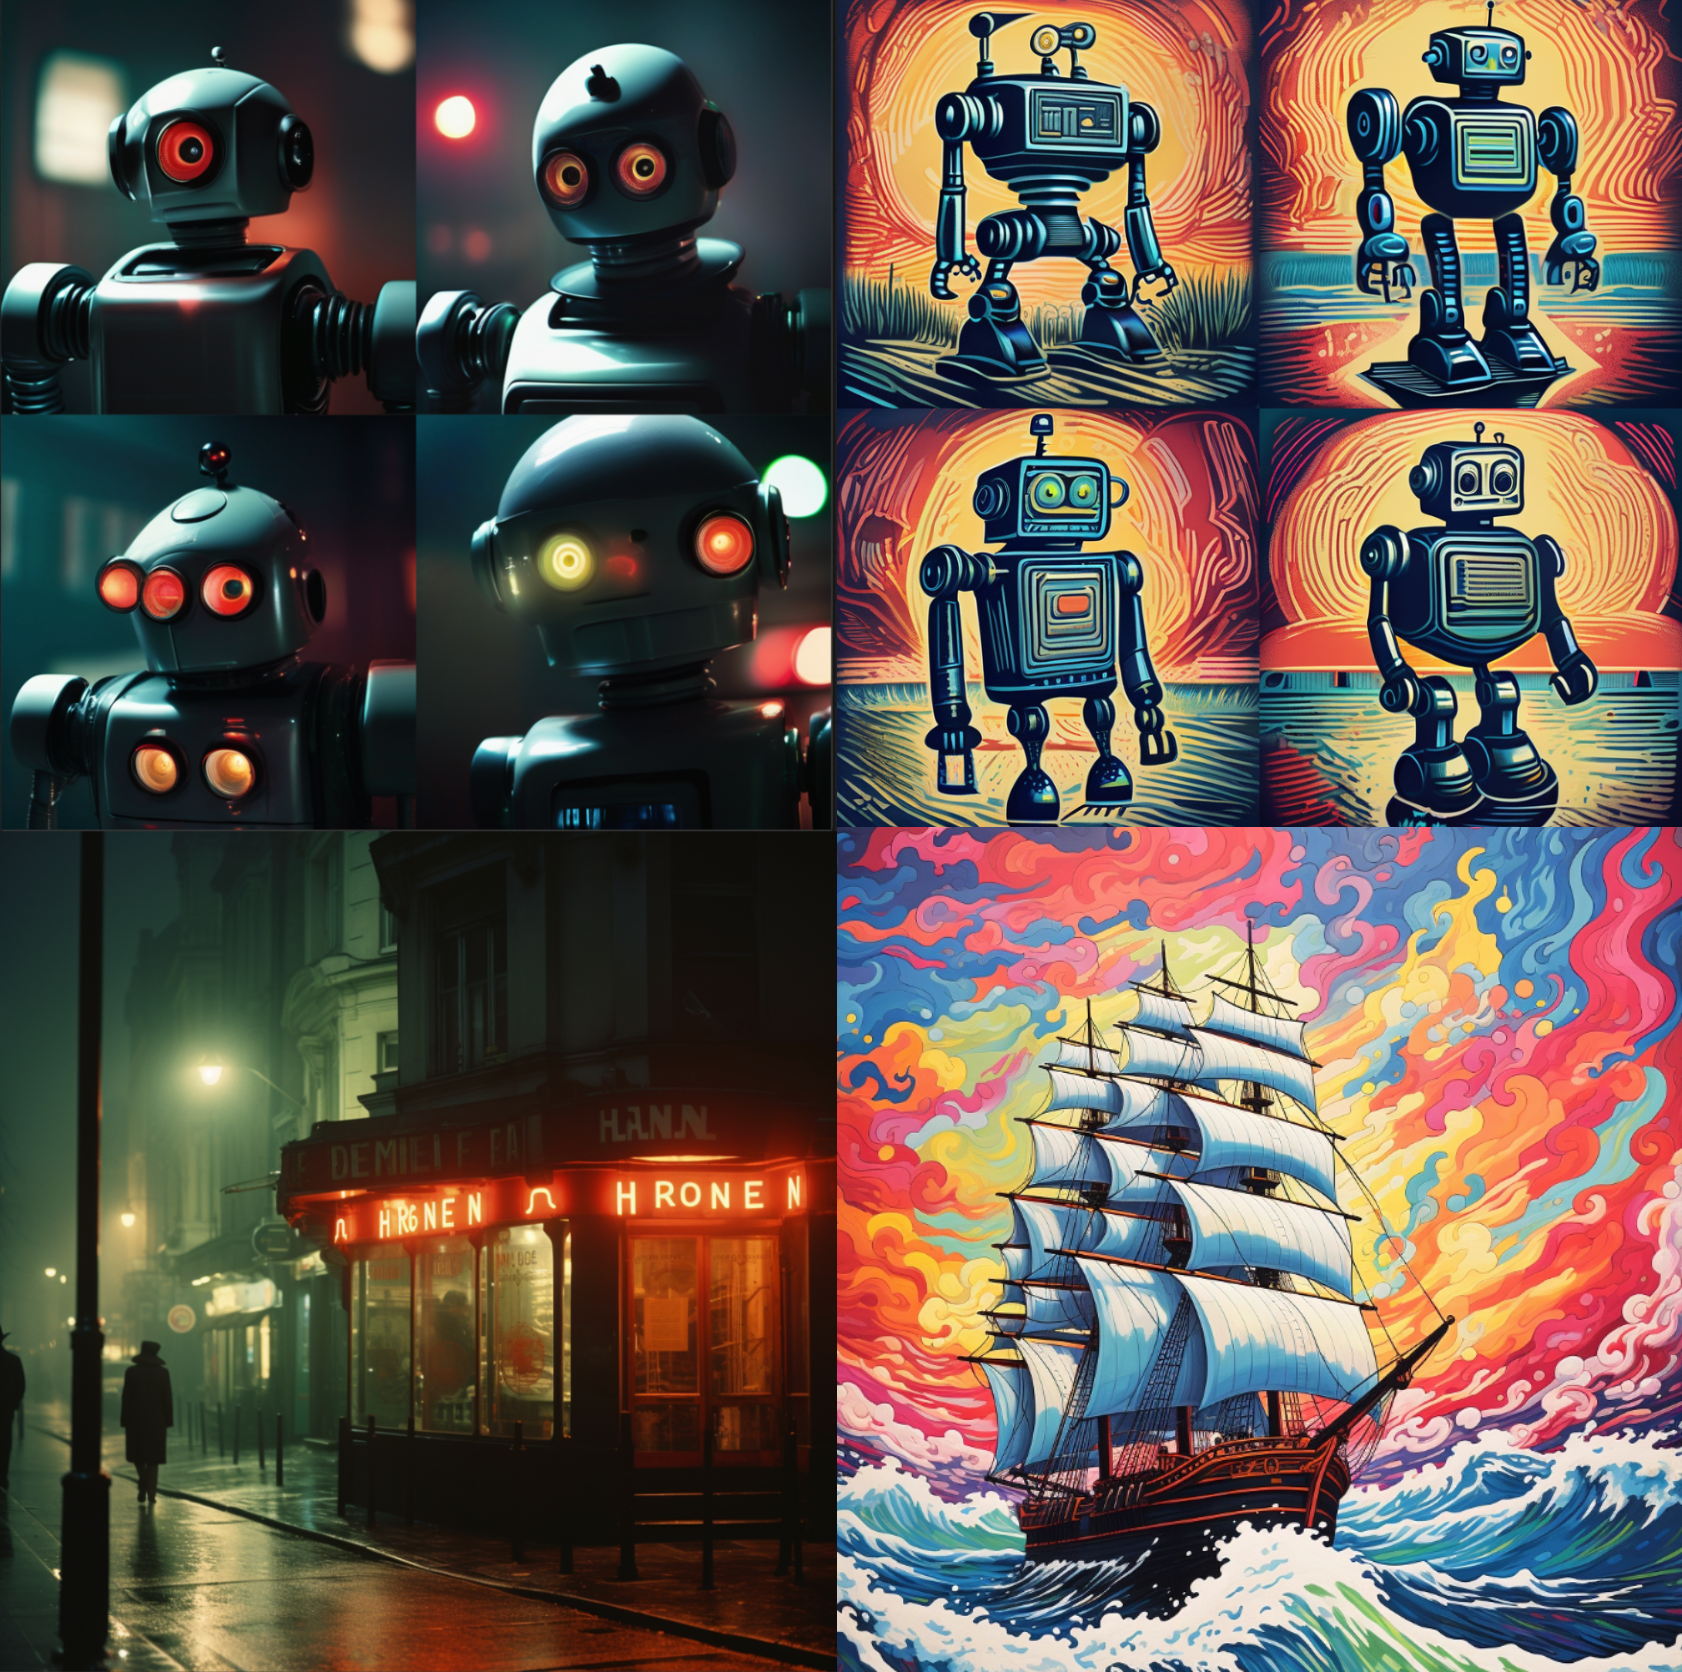
This is where StyleAligned and ConsisStory come in. They're recent techniques that satisfy all of the above conditions; though they're far from perfect in both cases, I think they're valuable tools in any generative artist's toolbox, and make use of some clever tricks to achieve their results.
As part of this exploration, I wrote my own implementation of StyleAligned as a ComfyUI node; you can use it here.
StyleAligned
The basic trick of StyleAligned is taking adaptive instance normalization - aka AdaIN - and applying it to the cross attention of Stable Diffusion's U-Net. So what is AdaIN? Put simply, you take the mean and standard deviation of a source feature, and apply it to a target feature. First developed in this paper, the features used used from an encoded representation of an image, and then applied to the decoder to generate a new image.
In the case of StyleAligned, the source features are taken from a source latent and applied to the self-attention layers of a U-net. The standard self-attention looks like this:
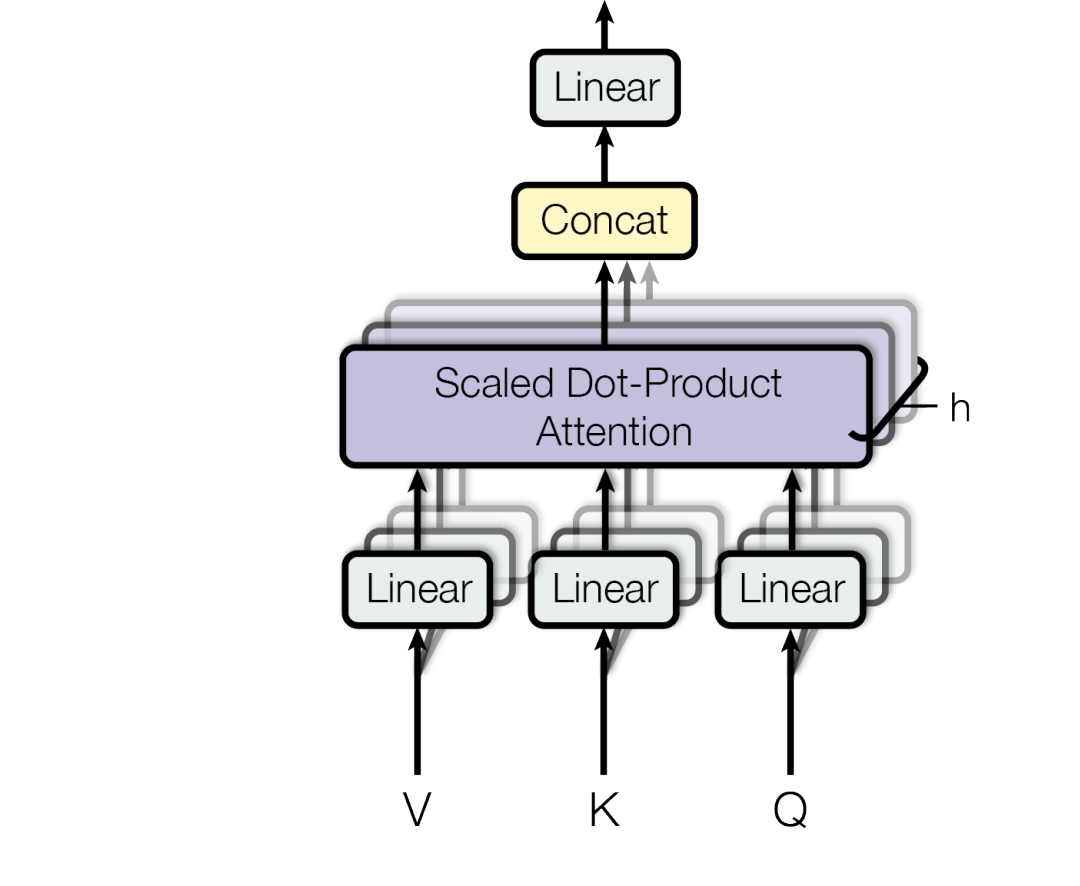
Where , , and are the queries, keys, and values of the attention. However, in StyleAligned, the self-attention layers look like this:
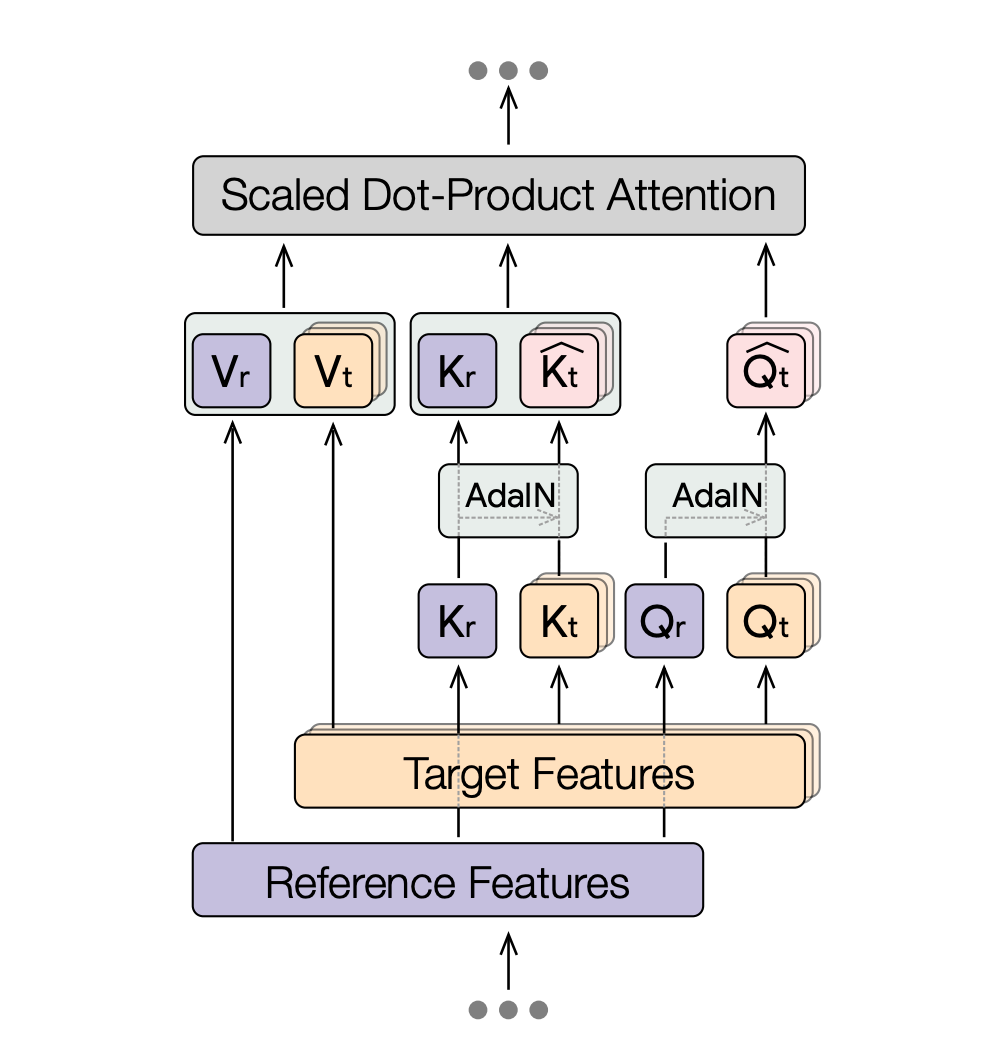
Where the QKV values also take input from a reference latent. In the case of the K and Q values, AdaIN is applied first; i.e., the values of Q and K are shifted and normalized to match the mean and standard deviation of the reference latent. The V values are then shifted and normalized to match the mean and standard deviation of the source latent. This allows the model to generate images that are in the style of the source latent, but with the content of the reference latent.
That's pretty much it! In order to get those QKV values, though, you need to perform DDIM inversion on your style reference image to get a source latent.
DDIM Inversion
In a standard diffusion forward pass, a generation starts with a noise tensor, and then is passed through a series of transformations to generate an image. In the case of DDIM inversion, the process is reversed; you start with an image, and then iteratively adjust the noise tensor to minimize the difference between the generated image and the input image. As a result, you get noise that can be used to generate an image that looks like the input image; i.e. if you were to denoise that noise with the same parameters used to denoise the input image, you'd get the input image back.
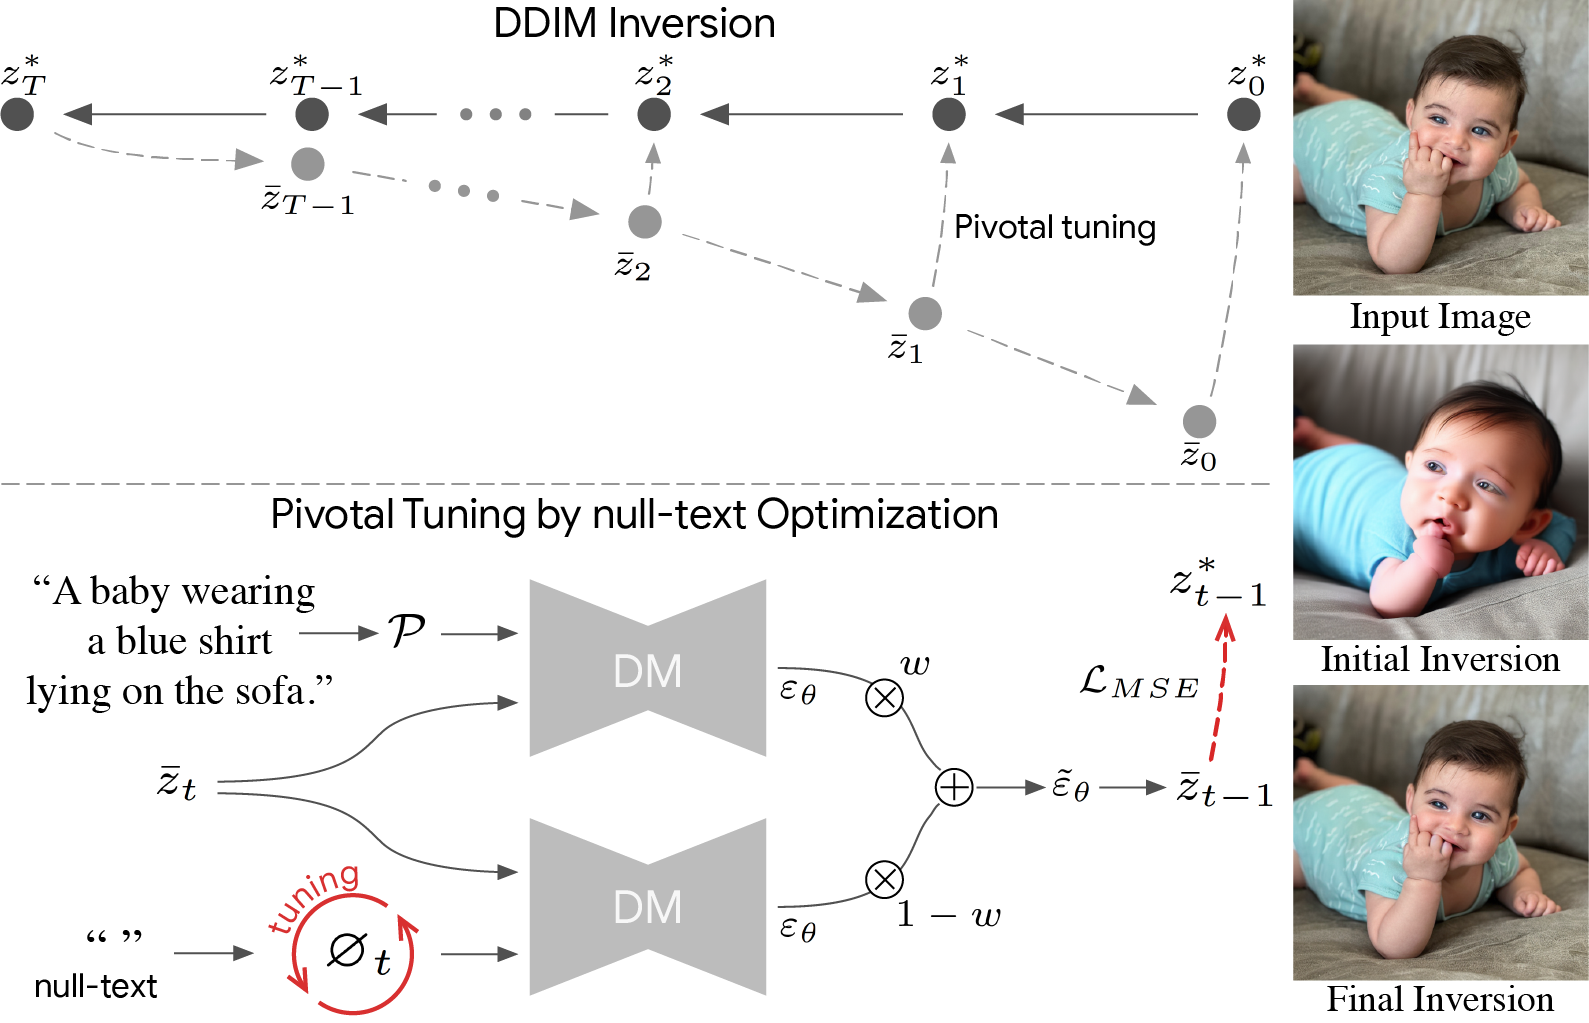
So, in order to get the source latent for StyleAligned, you need to perform DDIM inversion on your style reference image. This takes as long as standard inference, and only needs to be done once; you can then use that latent to generate as many images as you want in the style of the reference image.
ConsisStory
ConsisStory builds upon StyleAligned, and is a technique for generating images of a specific person. It adds several new concepts:
- Masking - segmenting out a sepcific part of the image, such as the face, and applying StyleAligned to that part of the image. This prevents leakage of style details to the target image.
- Dropout - randomly dropping out patches of the image from the AdaIN process, to prevent overfitting to the input image.
- Feature injection - given a correspondence map between the source and target image, the self-attention from the source is applied only to regions that correspond to the target image.
With these techniques, ConsisStory is able to maintain the identity of the input person, while generating a wide variety of images in the style of the source latent. Otherwise, the process is the same as StyleAligned, including the DDIM inversion.
And that's pretty much it! Go try out the Comfy node, and let me know if this was a useful overview.